Showing posts with label Kid Crafts. Show all posts

Wednesday, April 16, 2014

Collaborating on Art Projects with Little Kids


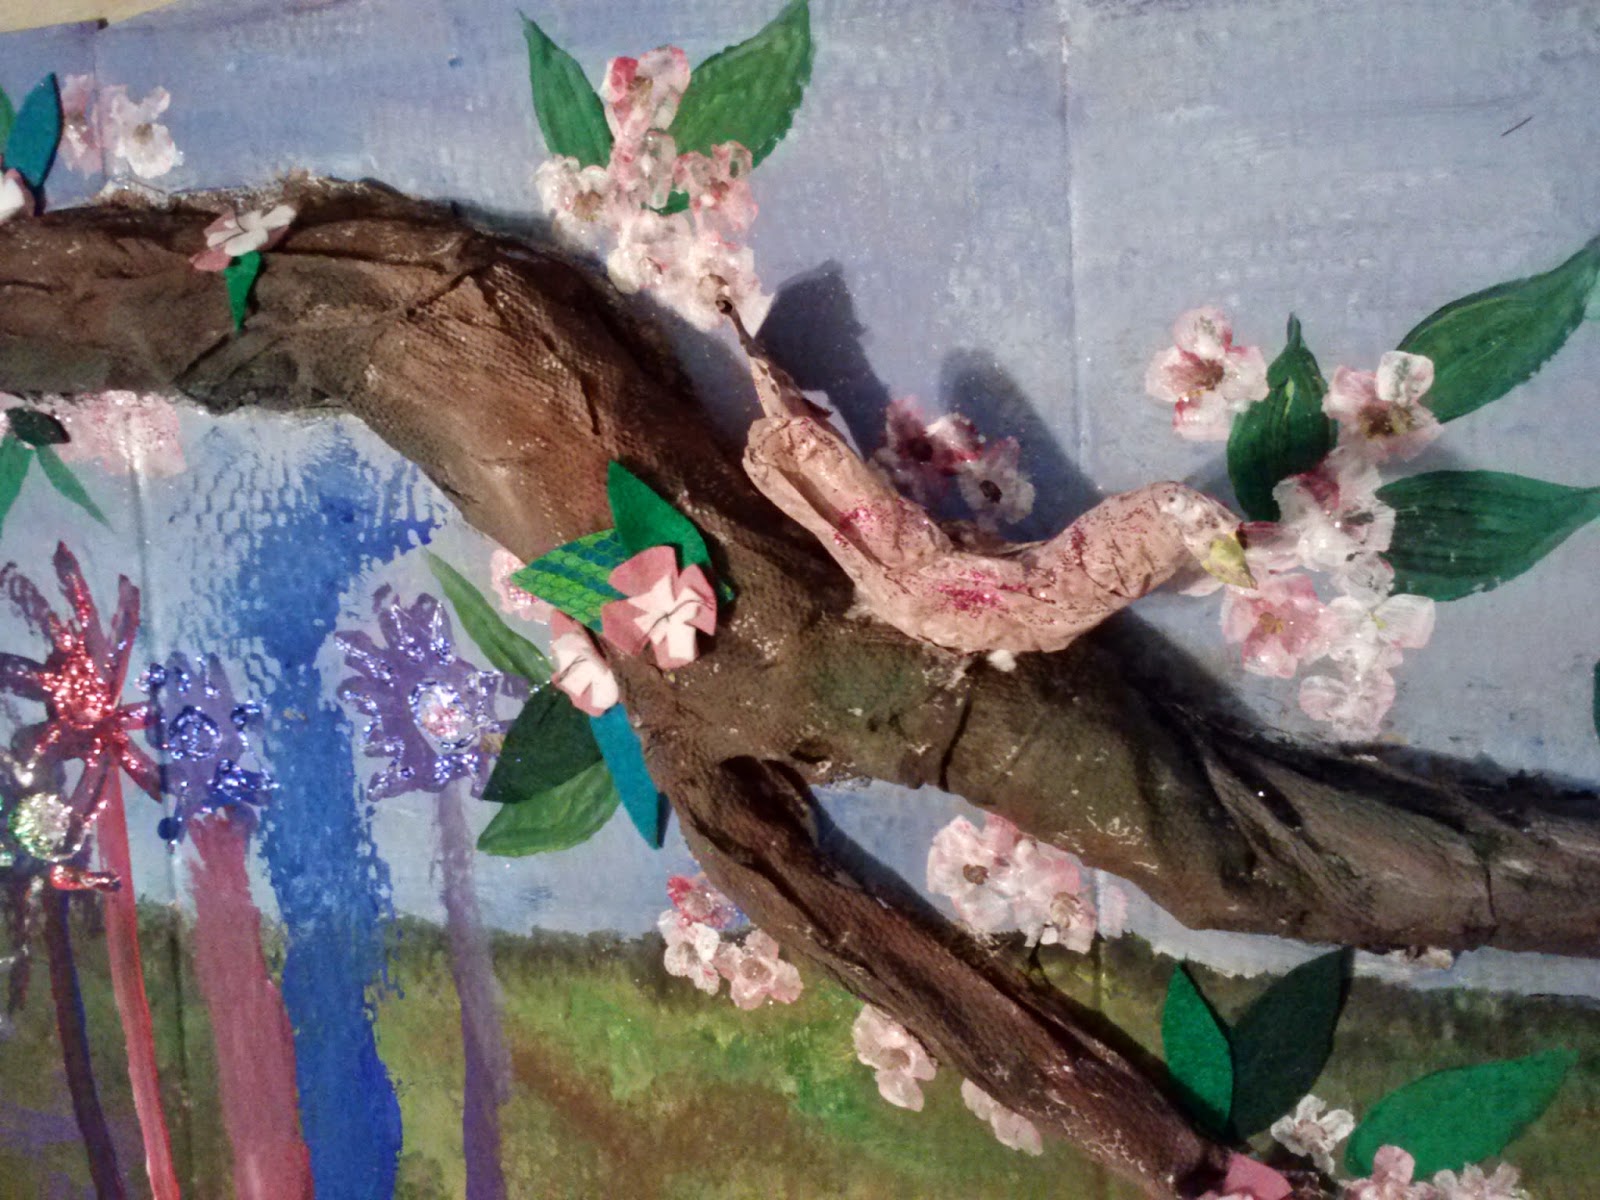
Detail of Our Ode to Spring

Collaborating on a project isn't easy. Collaborating on an art project with a 4yr old... You might think that it is impossible, but it is not. Here are 8 pointers to help you along.

1) Plan Ahead With Your Team - (Yes, I just referred to you and your child(ren) as a team. If you are going to make something together that is what you need to be.) Come up with a basic idea of what you are making, the materials you will need, the steps involved, where you will work, when you will do it, etc. This will help to get everyone invested in the project and give you a chance to organize in advance.

2) Identify Steps and Tasks - There are some things that you youngest team mates can't do but there are a whole lot of things they can. Identifying those things in advance makes redirection easy without letting it turn into a power struggle. For example: I need to be the one to use the X-Acto knife to cut here because it is very sharp, but we also need some triangles. Can you cut them with your scissors?

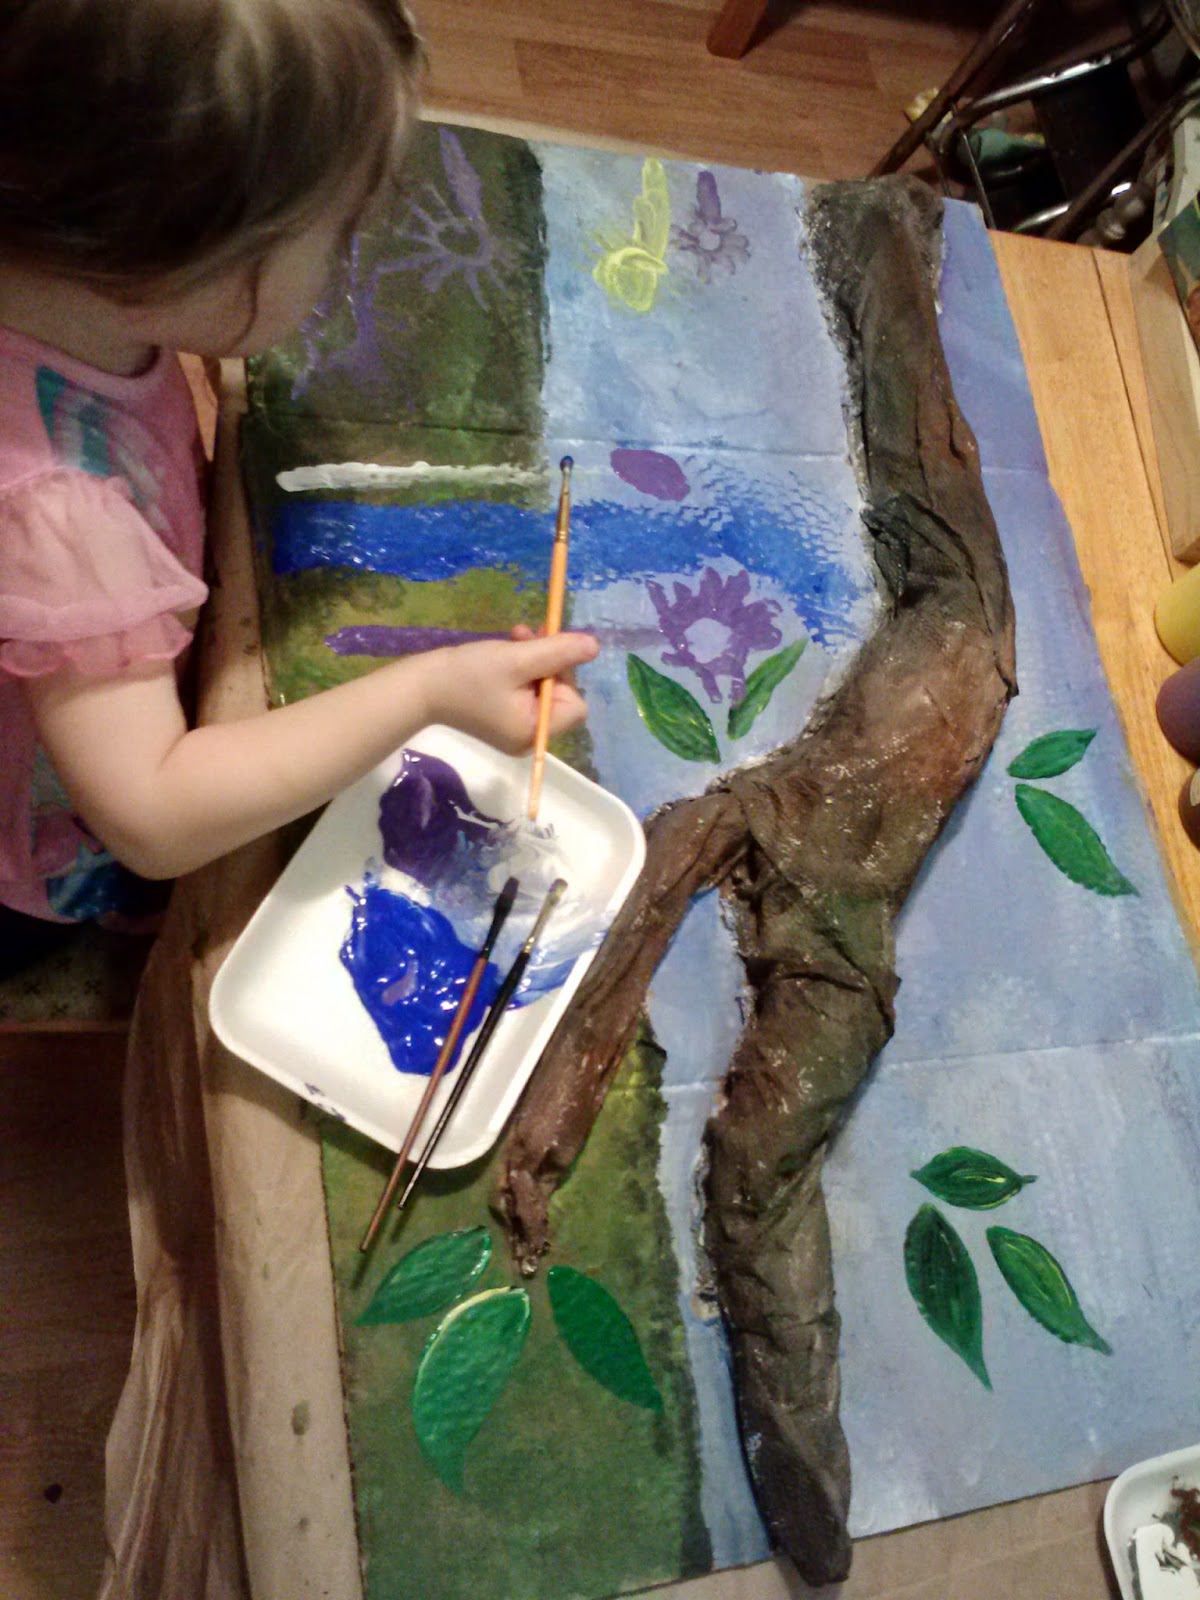
3) Give Them the Right Tools - If you want  small flowers don't hand them a big paint brush. If you are hoping for a garden of pink and purple, pull out those colors and leave the yellow and orange crayons in the box.

4) Let Go -  Yes, I know you have a vision of how this project is going to turn out, but so does every other member of your team. Ask open ended questions. Share your ideas. Communicate. Compromise. Create. This goes for kids and adults!

5) Plan Breaks - Not all attentions spans are created equally. Thankfully paint and glue take time to dry, creating convenient times for a break. Stretch. Have a snack. Change the music (or the baby). Take a nap. You don't need to finish in just one sitting. Remember - everything takes longer with kids, even art.


6) Check In - Every once in a while step back and look at your project. Share a complement. Ask a question (I noticed you used a different color on the belly of the bird. Why did you choose red?).

7) Resist the Impulse to 'Fix It'- Yes, it is crooked. No, it doesn't look like the one you saw on Pinterest. It was made by Your Team. It isn't 'wrong' and it doesn't need to be 'fixed'!

8) Be Proud -  Put your work on display. Encourage your child to talk about the art and the process with you and when showing others. What did they contributed and what did other team members add? What was challenging? What was new or fun? What do you want to make next?

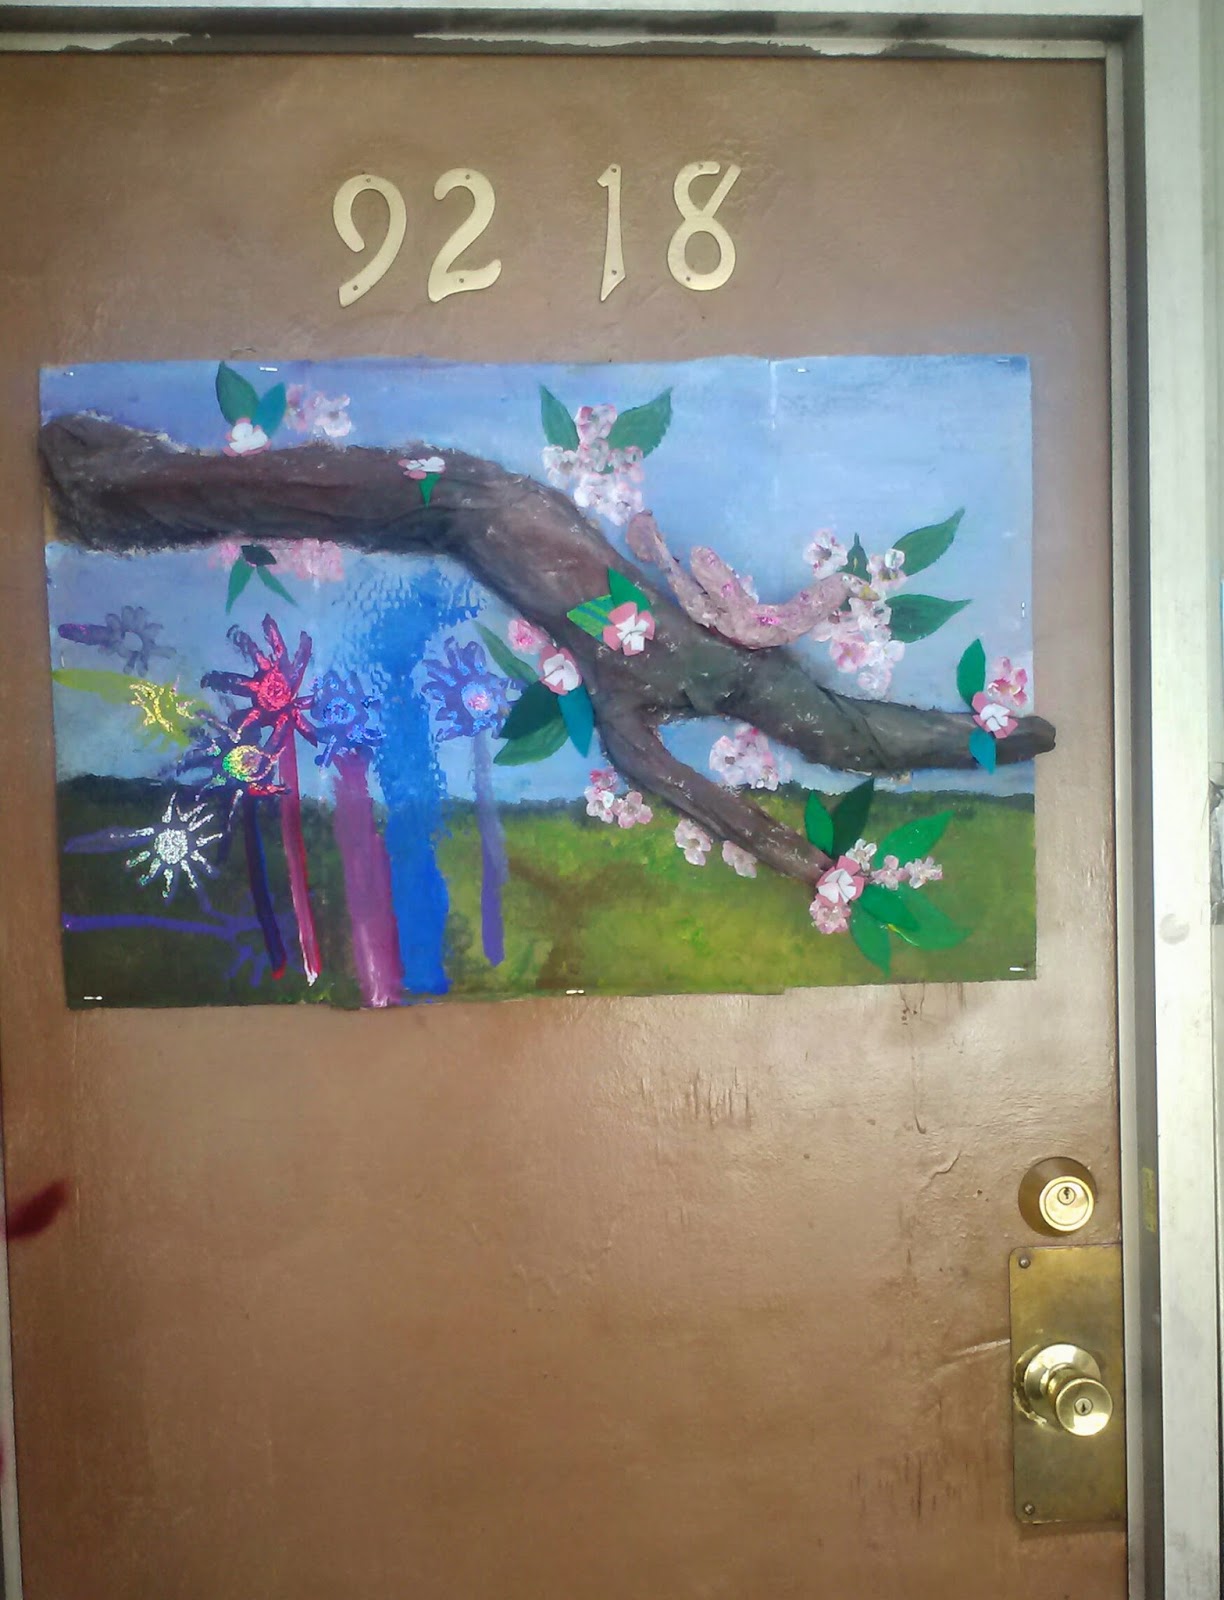
The Latest Neighborhood Beautification Project on Display


Monday, March 10, 2014

Turn, Turn, Turn Top - Little Kid Art Project


Turn, Turn, Turn Tops

Age: 18 Months - 8 Years or older (younger ones need more supervision)

Time: 15 min (+ lots more time playing with them!)

Theme: Color Mixing, Games

Books: White Rabbit’s Color Book by Alan Baker, Color Dance by Ann Jonas

Materials:
8” Round Cake Board (the cardboard base that bakeries use under their cakes)
Crayons*
Glass Beads (also called gems – they ones that are flat on one side)
Adults get to us a Hot Glue Gun

Prep: Set out the materials and plug in the hot glue gun safely out of reach

Activity: Each child gets a cake board and crayons. Decorate it any way you like! The ADULT then glues a glass bead to the center of the bottom. As soon as the glue cools, spin your top!

Notes/Tips: Ask you child what happened when their design was spinning. Challenge bigger kids to create a design that creates an optical illusion (like a spiral) or to experiment with the placement of the bead.

*The waxy surface of some cake boards resists crayon. If you want more vibrant colors try a student grade oil pastel (cray pas) or Crayola Construction Paper Crayons.  


Sunday, January 19, 2014

Feed the Monster Game - Little Kid Project


Feed the Monster Game

Age: 18 Months - 8 Years or older (younger ones need more supervision)

Time: 15 min (+ lots more time playing with them!)

Theme: Monsters, Games

Books: Leonardo the Terrible Monster by Mo Willems, Go Away Big Green Monster by Ed Emberly

Materials:
12 x 18 Construction Paper
Crayons
Tape (We used packing tape but any tape will do)
Monster food (wadded paper, Ping-Pong balls, large bottle caps, etc)
Adults and big kids get to use Scissors (or pinking sheers)

Prep: At the bottom middle of the 12” side of the paper cut an arch for the monster’s ‘mouth’. You can decide on the size depending on the ‘food’ to be used. Ours were about 3” x 4”. 

Activity: Each child gets a 12 x 18 sheet with a precut mouth and crayons. Design your monster! How many eyes will it have? Does it have crazy fur? How about some lips around that mouth? When you are happy with the way your monster looks, (an adult can help) roll the monster into a cylinder, taping the edge together. Set your monster up and try to feed it by sliding food into its mouth (or dropping it into its head).


Notes/Tips: Bigger kids can do the cutting themselves – even making ‘hair’ at the top edge. Make more than one monster and use them for sorting or counting activities (ex: this monster only likes green food).

Tuesday, September 3, 2013

Building a House - Little Kid Project


Building a House
 
Age: 24 Months - 5 Years (younger ones need more supervision)
Time: 15 min (+ Prep)
Theme: Houses, Homes, Construction
Books: A Duck at the Door by Jackie Urbanovic & The Hello, Goodbye Window by Norton Juster
 
Materials:
Heavy Construction Paper or Card Stock (for background)
Construction Paper (for roof, door, windows)
Craft Sticks
White Glue
Adults get to use Scissors
 
Prep: Precut roof, door & windows. For the roof make a 9” square from a standard (9 x 12) sheet of construction paper then fold into a triangle twice- this will create score lines to cut along for 4-1/2” right triangles. The remaining edge of the sheet can be cut for rectangular doors and windows of assorted sizes.
 
Activity: Each child gets a sheet of heavy paper, roof, a door, a few windows, several craft sticks and white glue. Let construction begin! Remember: houses come in all different shapes and sizes, so there is no right or wrong to the construction.   
 
Notes/Tips: Older kids can practice their scissor skills by cutting the pieces themselves. Craft sticks may slide while the glue is wet so it is best to let this project dry flat. To help portion glue put it in a tray or cup and apply with a paintbrush.


Sunday, July 28, 2013

Magic Wands - Little Kid Art Project


Magic Wands

Age: 18 Months – 5+ Years (younger ones need more supervision)

Time: 10 min (+ Prep)

Theme: Magic

Books: The Magic Rabbit by Annette LeBlanc Cate, Extra Yarn by Mac Barnett

Materials:
Adhesive Backed Felt or Craft Foam
Yarn & String Scraps
Chopsticks
Adults get to use Scissors

Prep: Fold felt/foam and cut doubled shapes for wand tops (roughly 1”). Leave the folded edge intact (this way the pieces are more easily folded closed). Cut yarn and string into various lengths 4” – 12”

Activity: Each child gets a chopstick, a felt/foam shape and several pieces of yarn/string. Take the backing off of the felt/foam and place the top of the chopstick in the middle of the sticky side (littlest artists will need help with this). Choose what types of yarn and string your magic will travel on best. Add them to the sticky side too. When you have enough magic strands, close the wand top. Practice your magic. (Don’t forget to change everyone back to their original form before dinner!)

Notes/Tips: Kids who are learning scissor skills can practice on the yarn & string. String cuts best when held taunt, so this is also an opportunity for teamwork. In a group setting, magic wands can be used as ‘talking sticks’, indicating whose turn it is to speak. Foam stickers also work as wand tops.
 

Tuesday, June 18, 2013

Sand Paper Castles - Little Kid Art Project


Life has been quite busy lately so I haven't been posting projects as regularly as we have been making them. One project that we did were sand paper castles. The project was a great success so I made sure to snap a few pics. About a week later I saw this Kiwi Crate post... I guess great minds think alike.

Theme: Summer, The Beach, Sand Castles

Book Ideas: A Beach Tail by Karen Lynn Williams, Hamsters to the Rescue by Ellen Stoll Walsh, The Sand Castle Contest by Robert Munsch (older kids)

Materials:
Heavy Grit Sandpaper (1 sheet should be enough for 4 - 6 kids)
Background Picture (we found this stock pic) or plain paper works too
Glue Stick
Adults and Big Kids get to use Scissors

Prep: If using one, print picture to use as background. Cut sandpaper into simple geometric shapes in a variety of sizes no greater than 3". Be sure to create a few semi-circles for bridges and narrow rectangles for towers.

Activity: Each kid gets a background, a glue stick and several castle pieces. Design your own castle! Does it have a draw bridge? A moat? Towers with high spires? Maybe there is more than one on your beach. Let your inner architect play!

Notes/Tips: Bigger kids can cut their own pieces. This can easily be a scrapbook page project used along with photos from your own day at the beach.


Monday, June 3, 2013

Paper Pig Puppet - Little Kid Project


Paper Pig Puppet
 
Age: 18 Months - 5 Years (younger ones need more supervision)

Time: 10 min (+ Prep)

Theme: Pigs

Books: Pigs to the Rescue by John Himmelman, Happy Pig Day by Mo Willems
 
Materials:
Pink Construction Paper
Extra Small Paper Bag (beverage size)
Crayons
Glue Sticks
Adults get to use Scissors

Prep: From the pink paper cut 2 triangle ears and an oval for a snout. For the hooves cut 4 rectangles about 1” x 2” then add a small notch at the end of each. For the tail use a circle about 1-1/2” cut into a spiral.

Activity: Each child gets a small bag, 2 ears, 4 hooves, a snout and a tail and a glue stick for putting it all together. Once assembled, trade the glue stick for crayons. Add eyes, nostrils, spots, clothes, mud, anything you like. Then it is time for a pig party!

Notes/Tips: Older kids can practice their scissor skills by cutting the pig pieces out themselves. Beverage size paper bags are just the right size for little hands, but you can use lunch size bags too, just make the pig pieces bigger.
 

Saturday, May 11, 2013

Watercolor Seek & Find


The Figlet has been enjoying hide-and-seek more than ever lately, so the last time we got out the water colors we made a little game of it.
 
I used a white crayon to draw hearts all around the paper before I gave it to her for painting. She was delighted every time she found one!

Friday, February 8, 2013

How to Make a Secret Message Card

 
 I was going to make these with the school age kids I work with today, but a snow storm got in the way. I was really excited that they were going to be able to use this process for Valentines cards. Unfortunately the next time we meet will be after the holiday. Sigh...
 
 
The idea is to use Alphabet Noodles  to create cards that contain secret messages that can be revealed by rubbing over the area with a crayon. The card itself is like any basic hand made card, but the message is spelled out in pasta then hidden under an extra layer of paper. The lighter weight the 'cover' paper the more clearly the message shows when you create the rubbing, so be sure to use 20# (copy paper weight) or lighter.
 
A test rubbing made with heavier paper


Thursday, January 31, 2013

Blast Off Rockets - Toddler Art Project


Blast Off Rockets

Age: 18 Months - 5 Years or older (younger ones need more supervision)

Time: 15 min (+ Prep)

Theme: Rockets, Space, Imaginative play

Books: On the Launch Pad: A Counting Book About Rockets by Nancy Atterbury, Not a Box by Antoinette Portis

Materials:
Card Stock Weight Paper
Colored Cellophane (We used red but any color will do)
Glue Sticks
Small pictures of faces (I found them in old magazines and used a 1” round punch to cut them out)
Adults get to use Scissors or Exacto Knife and a Ruler

Prep: Cut the four primary pieces of the rocket out of card stock. Our rockets consisted of a 3” x 5” rectangle for the body, the side ‘wings’ are a 3” x 4” rectangle cut into 2 triangles, and the point was half of a 4” square, but you can cut them to whatever scale you like. Cut 3-5 strips of colored cellophane to be the jet, and several faces (human or animal) to act as passengers.

Activity: Each child gets a set of pieces: 1 large rectangle, 1 large triangle, 2 smaller triangles and colored cellophane. Using a glue stick, assemble the rocket (adding the jet last so it doesn’t take off before they are ready). Choose some passengers and add them onto the body of the rocket. Time to Blast Off!
 

Notes/Tips: Putting the 'passengers' out on a large paper plate will help them from ending up everywhere. Choosing passengers after the rocket is assembled will also give the glue a few moments to dry before playing. If you don't have any colored cellophane, party streamers make a fine jet too. Don’t forget to talk about the shapes - its a preliminary math skill.
 
Working on cutting skills with the scraps.

Sunday, January 20, 2013

Love Ewe Sheep


I came across a picture of these Love Ewe Sheep we made last year (before I started blogging) and thought it might inspire some Valentines cards.

To make them I cut out blocky "n" shapes for legs and faces shaped like a peanuts with floppy ears out of black construction paper. I also cut out a bunch of different sized hearts from red construction paper. The big sheep body is a crumpled coffee filter, and the smaller one is a crumpled oval of tissue paper. The kids glued all the pieces together on a background color of their choice.

One detail I do recall from making them was that it didn't matter if the legs were glued down first or not because little ones rarely glue edge tight anyway.


Tuesday, January 15, 2013

Garbage Truck = Snow Plow?! In NYC it does!

Image borrowed from this web site that has lots of neat info about garbage trucks
Did you know that in New York City we don't have many big snowplows? When we get a snow storm, they suspend garbage pick up and put plow blades on the front of the garbage trucks!

Armed with that bit of trivia and inspired by this 3D Snowplow Craft from Reading Confetti, I came up with this activity to share with the little ones at story time.

We started with a coloring page of a city garbage truck. I used this one but I printed it, trimmed the blah blah blah info off the bottom then made copies for the kids.
 
We used our glue sticks to attach the TP tube plow blade and cotton ball snow. (The little ones really enjoyed pulling the cotton apart.) Then we traded in our glue sticks for crayons and colored them in.